Funke's presents

Easy Gardening

A "How To" guide for the lazy gardener :)

Page 2

If you'd like to see a larger version of any of the pictures just click on them to open an 800x600 version in a new window.

Step 5 - Spread soil & apply weed preventer

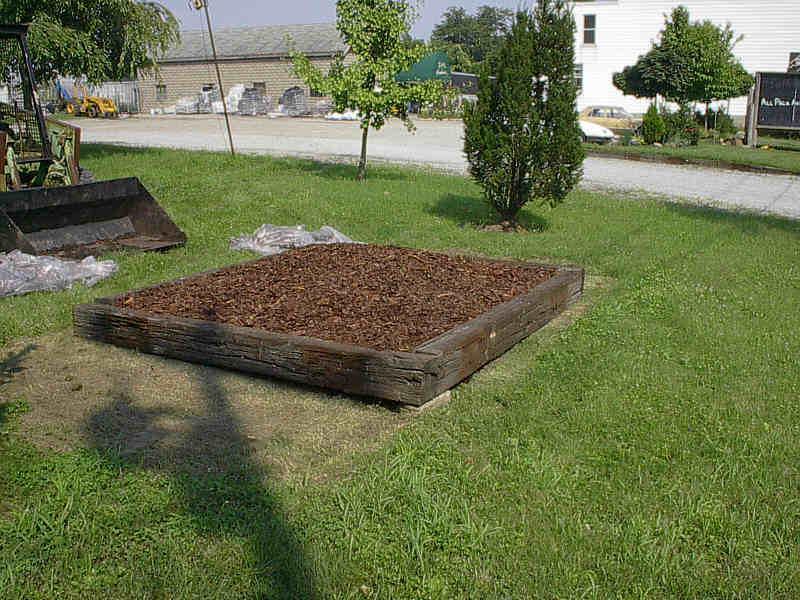
 Using a shovel or a rake spread the soil evenly in the bed leaving about 4-5" between the top of the soil and the top edge of the bed sides at the edges. This leaves room for the mulch :) Once the soil is spread shake out the weed preveter giving even coverage. Using the pine mini nugget this may not be a necessary item but I've found that the ounce of prevention is indeed worth the pound of cure :)

If you will notice I also leveled (by sight, not instrument) the bed sides here raising the one low corner with a flat rock of the needed thickness.


Step 6 - add mulch

For this bed I used 15 2 cu. ft. bags of pine bark mini nugget which gave a depth of 4-6" over the top of the aprox. 8' x 8' raised bed. I use the pine for mutiple reasons. No pests, no diseases, very few if any weeds will sprout in it, drains incredibly well during monsoon season, keeps roots cool and moist during drought & heat, Excelent winter protection for plant roots, and last but not least this depth will last for years!! How's that for bang for buck? :)

Oh, and it looks good too :)


Step 7 - add plants!

With this bed prep technique when you reach this stage put the tools away :) You won't need tham because everything is so soft you can work with your hands. I simply pushed the mulch back out of the way and pushed the soil back under the mulch to yeild a planting hole for a 3 gallon shrub. You can see my size 10 foot in the picture to give an idea of the size of hole here :)  

Step 8 - planting

Just pop the plant out of the pot, rough up the roots a little and drop it in the hole! Then push some soil back against the root ball and close the mulch back up. It took me less than 2 minutes to plant this shrub :)

I chose to use dwarf crape myrtle for the rear bed corners. Actually with the exposeure on this bed site using this zone 6 hardy item is a test of hardiness. If were doing a standard insatllation into hard clay soil I would never attempt using this plant in this location.

Roots happy, tops happy.

This bed technique makes roots VERY happy!


Step 9 - finished progect!

The semi finished bed :) Beds are always a work in progress for me since I add odds n' ends untill I have what I want in them :) If I were doing this install for a customer I would have planted all to customer specs and probably added some topsoil around the edges of the front & side to finish grade merging the bed into the lawn. For me.. I'll let it settle and probably add some soil to the gaps at the base of the ties before winter :)

The upright evergreen is a dragon lady holly, also a zone 6 item hardiness test. This spot really does get winter blasting. Based on previous experience I'll give it 90+ % chance of success :) The two little plants in the front are kamschatka sedum which will spill over the front :)


 Proof of the pudding :) Same bed, two weeks later, 95 degree heat, one short gulleywasher from nature & no assist from the gardener!! Oh, I did add the hostas.. Since the bed is full all day blasting sun I chose Sum 'n substance and "praying hands" for the hosta selections in this bed :)

Hostas with heavy substance (leaf thickness) are better choices for bright areas and slug resistance due to the extra epidermal layers. hehe.. sometimes it pays to be thick skinned :)


<previous Next page>